Are you looking to improve your flexibility through yoga? If so, you’ve come to the right place! In this article, we will explore the best yoga workouts that can help enhance your flexibility, allowing you to move with more ease and grace. From gentle stretches to challenging poses, we will guide you through a variety of yoga exercises that will help you increase your flexibility and find a deeper connection with your body. So, roll out your mat, take a deep breath, and get ready to discover the best yoga workouts for flexibility! If you’re looking to improve your flexibility through yoga, you’re in the right place! In this article, we will explore the top 10 yoga workouts specifically designed to enhance your flexibility. These poses are not only great for increasing range of motion, but they also provide numerous health benefits for both your mind and body. So, roll out your mat, put on some comfortable clothes, and get ready to discover a new level of flexibility with these amazing yoga poses.

This image is property of cdn.shopify.com.
1. Sun Salutation (Surya Namaskar)
a. Description
Sun Salutation, also known as Surya Namaskar, is a sequence of yoga poses that flow seamlessly from one to another. It is often performed as a warm-up or as a complete practice in itself. Sun Salutation consists of a series of forward and backward bending poses, providing a full-body stretch and promoting flexibility in the spine, hamstrings, shoulders, and hips.
b. Benefits
The benefits of Sun Salutation extend beyond flexibility. It helps improve circulation, boosts energy levels, enhances focus and concentration, and strengthens the entire body. Regular practice of Sun Salutation can also help relieve stress and anxiety, making it an excellent addition to any yoga routine.
c. How to Do It
To perform Sun Salutation, start in Mountain Pose (Tadasana) at the top of your mat. Inhale and raise your arms overhead, reaching towards the sky. As you exhale, dive forward, hinging at the hips, and place your hands on the mat. Step or jump back into a plank position, then lower your body down into Chaturanga Dandasana. Inhale, lift your chest into Upward-Facing Dog (Urdhva Mukha Svanasana), and exhale into Downward-Facing Dog (Adho Mukha Svanasana). From Downward-Facing Dog, step or jump forward, and return to the standing forward bend position. Inhale, sweep your arms up overhead, and come back to Mountain Pose. Repeat this sequence for a few rounds, focusing on the breath and maintaining a smooth flow of movement.
d. Modifications and Variations
If you’re new to yoga or have any limitations, there are modifications and variations available for Sun Salutation. For example, you can use blocks or props to assist in the standing forward bend and modify Chaturanga Dandasana by placing your knees on the mat. Remember to listen to your body and make adjustments as needed to ensure a safe and comfortable practice.
2. Standing Forward Bend (Uttanasana)
a. Description
Standing Forward Bend, or Uttanasana, is a pose that involves folding forward from the hips, allowing the spine to lengthen and stretch. It is a gentle inversion that helps relieve tension in the back, shoulders, and hamstrings while promoting flexibility and relaxation.
b. Benefits
In addition to enhancing flexibility, Standing Forward Bend calms the mind, improves digestion, and stimulates the nervous system. It also helps relieve stress and anxiety by encouraging deep breathing and releasing tension from the upper body.
c. How to Do It
To perform Standing Forward Bend, start in Mountain Pose. Inhale, reach your arms overhead, and as you exhale, hinge forward from the hips, lowering your torso towards your legs. Allow your spine to lengthen, and keep your knees slightly bent if needed to maintain a comfortable position. Place your hands on the mat or grab onto your shins, ankles, or toes. Take deep breaths, relaxing into the pose and allowing gravity to gently stretch your hamstrings and back. Hold the pose for a few breaths or longer, and slowly come up to standing when you’re ready.
d. Modifications and Variations
If you have tight hamstrings or find it challenging to reach the floor, you can use blocks to support your hands or maintain a slight bend in your knees. Alternatively, you can practice Half Standing Forward Bend by placing your hands on a raised surface such as a chair or the back of a sofa. This modification allows you to experience the benefits of the pose while gradually working towards a full Standing Forward Bend.
3. Triangle Pose (Trikonasana)
a. Description
Triangle Pose, or Trikonasana, is a standing pose that involves extending the legs wide apart and reaching one hand towards the floor while the other arm extends upward. This pose helps to open the hips, stretch the hamstrings and inner thighs, and improve overall posture and stability.
b. Benefits
The benefits of Triangle Pose extend beyond flexibility. It strengthens the legs, stretches the side body, stimulates digestion, and improves balance and coordination. It also helps relieve lower back pain and sciatica, making it an excellent choice for those with sedentary lifestyles or desk jobs.
c. How to Do It
Start in a wide-legged stance with your feet about 3 to 4 feet apart. Turn your right foot out to a 90-degree angle and pivot your left foot slightly inward. Extend your arms out to the sides, parallel to the ground. As you exhale, hinge at the hip and reach your right hand towards the right foot, keeping both legs straight. Place your right hand on your shin, ankle, or the floor, and extend your left arm upwards, aligning your shoulders vertically. Keep your neck relaxed and gaze either towards the ground or up towards your left hand. Hold the pose for a few breaths, gradually increasing the duration as you become more comfortable. Repeat on the other side.
d. Modifications and Variations
If you struggle to reach the floor with your hand or experience discomfort in the neck, you can use a block or prop to support your hand. You can also modify the pose by placing your bottom hand on your shin rather than reaching for the floor. It’s important to honor your body’s limitations and make adjustments that allow you to find a comfortable and sustainable expression of Triangle Pose.
4. Downward-Facing Dog (Adho Mukha Svanasana)
a. Description
Downward-Facing Dog, or Adho Mukha Svanasana, is perhaps one of the most recognizable yoga poses. It involves an inverted V-shaped position, with hands and feet on the ground and the hips lifted towards the sky. This pose provides a deep stretch for the entire body, particularly the hamstrings, calves, and shoulders.
b. Benefits
Downward-Facing Dog is a full-body stretch that increases flexibility in the hamstrings, calves, shoulders, and spine. It also helps to strengthen the arms, wrists, and core muscles. This pose improves circulation, energizes the body, and enhances overall body awareness and coordination.
c. How to Do It
Begin on your hands and knees, with your hands shoulder-width apart and your knees hip-width apart. As you exhale, lift your hips towards the ceiling, straightening your legs and arms. Press your hands firmly into the mat, spreading your fingers wide for stability. Allow your head and neck to relax between your arms and gaze towards your navel or feet. Engage your core by drawing your navel towards your spine and lengthen your spine by reaching your tailbone towards the sky. Take slow, deep breaths, staying in the pose for several breaths or longer.
d. Modifications and Variations
If you have tight hamstrings or wrists, you can bend your knees slightly or place your hands on blocks to decrease the intensity of the stretch. Another modification is to practice Puppy Pose, where your forearms rest on the mat instead of your hands. This variation allows you to still experience the benefits of a deep stretch while reducing strain on the wrists and shoulders. Remember to listen to your body and modify the pose as needed to support your individual flexibility and comfort.

This image is property of i.pinimg.com.
5. Extended Puppy Pose (Uttana Shishosana)
a. Description
Extended Puppy Pose, or Uttana Shishosana, is a gentle chest-opening pose that stretches the spine, shoulders, and arms. It is a variation of Child’s Pose, providing a deeper stretch for the upper body.
b. Benefits
Extended Puppy Pose helps to release tension in the shoulders and upper back, creating space in the spine and chest. It improves posture, relieves stress and anxiety, and promotes relaxation. This pose is particularly beneficial for individuals who spend long hours sitting or hunched over a computer.
c. How to Do It
Start on your hands and knees, with your knees directly below your hips and your hands slightly forward of your shoulders. Walk your hands forward, extending your arms and allowing your chest to melt towards the mat. Keep your hips aligned over your knees. Lengthen your spine by reaching your tailbone towards the ceiling and pressing your chest towards the floor. Allow your forehead to rest on the mat or a block if needed, and relax your neck and shoulders. Hold the pose for several breaths, feeling the stretch in your back, shoulders, and arms.
d. Modifications and Variations
If you have tight shoulders or find it difficult to reach the mat, you can place a bolster or a stack of blankets under your chest to support and elevate your upper body. Another option is to use a strap or belt to hold onto as you lengthen your arms forward, providing additional support and stability. Remember to honor your body’s limitations and adjust the pose as necessary to find a comfortable and accessible variation that suits your needs.
6. Seated Forward Bend (Paschimottanasana)
a. Description
Seated Forward Bend, or Paschimottanasana, is a seated pose that involves folding forward from the hips, elongating the spine, and stretching the hamstrings and lower back. This pose is excellent for increasing flexibility in the posterior chain of the body.
b. Benefits
Seated Forward Bend provides a deep stretch for the entire back body, including the spine, hamstrings, and calves. It helps to calm the mind, relieve anxiety and mild depression, and improve digestion. This pose also stimulates the internal organs, promoting overall health and well-being.
c. How to Do It
Start by sitting on the mat with your legs extended in front of you. Flex your feet, pressing the heels firmly into the mat. Inhale, elongate your spine, and as you exhale, hinge forward from the hips, reaching towards your feet. Reach your hands towards your shins, ankles, or feet, depending on your flexibility. If you are unable to reach your feet comfortably, you can use a strap or towel to gently hold onto instead. Focus on maintaining a long spine, avoiding rounding or hunching the back. Take slow, deep breaths, allowing gravity to gently guide you deeper into the stretch. Hold the pose for a few breaths or longer, and slowly come out of the pose when you’re ready.
d. Modifications and Variations
If you have tight hamstrings or find it challenging to reach your feet, you can bend your knees slightly or use a strap to hold onto the soles of your feet. Placing a bolster or folded blanket on top of your legs can also provide additional support and elevation, allowing you to gradually work towards a greater range of motion. Remember to approach the pose with patience and respect for your body’s unique needs and limitations.

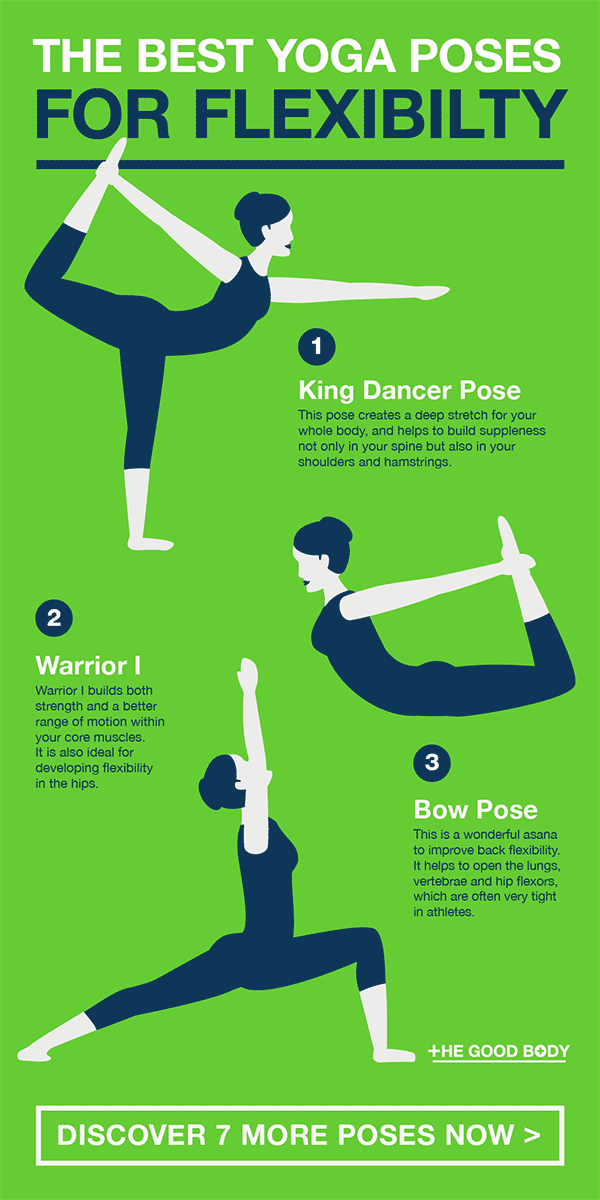
This image is property of www.thegoodbody.com.
7. Reclining Hand-to-Big-Toe Pose (Supta Padangusthasana)
a. Description
Reclining Hand-to-Big-Toe Pose, or Supta Padangusthasana, is a supine pose that involves lying down on your back and extending one leg upwards while holding onto the big toe. This pose provides a deep stretch for the hamstrings, calves, and hips.
b. Benefits
Reclining Hand-to-Big-Toe Pose helps to increase flexibility in the legs and hips, while also releasing tension from the lower back. It improves balance and stability, strengthens the core muscles, and stimulates the digestive and reproductive systems. This pose is particularly beneficial for athletes, runners, and individuals with sedentary lifestyles.
c. How to Do It
Lie down on your back, extending both legs towards the ceiling. Bend your right knee towards your chest, and loop a strap or towel around the arch of your right foot. Hold the strap with both hands and extend your right leg towards the sky, keeping it straight and actively pressing the heel upward. Relax your shoulders and neck, allowing the strap to support the weight of your leg. If you have the flexibility, you can experiment with gently guiding the leg towards your head, deepening the stretch. Hold the pose for a few breaths or longer, and slowly release the leg back to the starting position. Repeat on the other side.
d. Modifications and Variations
If you have limited flexibility in your hamstrings or find it difficult to keep your leg straight, you can use a strap or towel to hold onto your foot as you extend your leg upward. Another option is to bend the extended leg and place a strap around the sole of the foot, allowing you to still experience a stretch in the hamstring while keeping the knee bent. Remember to adjust the tension of the strap as needed to find a comfortable stretch that supports your flexibility goals.
8. Bridge Pose (Setu Bandhasana)
a. Description
Bridge Pose, or Setu Bandhasana, is a backbend that involves lifting the pelvis while keeping the feet and shoulders grounded. This pose provides a deep stretch for the chest, hips, and thighs, while also strengthening the back muscles and core.
b. Benefits
Bridge Pose opens and stretches the front body, including the chest, shoulders, and hip flexors. It also helps to reduce back pain, relieve stress and anxiety, and improve digestion. In addition, Bridge Pose stimulates the thyroid and pituitary glands, promoting hormone balance and overall well-being.
c. How to Do It
Lie down on your back with your knees bent and your feet hip-width apart, close to your sitting bones. Place your arms alongside your body, palms facing down. Press your feet firmly into the ground, engaging your inner thighs and glutes. As you inhale, lift your hips towards the ceiling, maintaining the natural curve of your spine. Roll your shoulders underneath you, interlacing your hands if desired. Open your chest towards the chin, but avoid straining your neck. Hold the pose for several breaths, focusing on the expansion of your chest and the engagement of your legs and glutes. Slowly release back down to the mat, one vertebra at a time.
d. Modifications and Variations
If you have a sensitive lower back or find it challenging to lift your hips off the ground, you can place a block or bolster under your sacrum for support. This modification allows you to experience the benefits of the pose while reducing the pressure on your lower back. Another option is to practice One-Legged Bridge Pose by extending one leg towards the sky while keeping the other foot grounded. This variation increases the intensity of the stretch in the hip flexors and quadriceps. Remember to listen to your body and adjust the pose as necessary to ensure a safe and comfortable practice.

This image is property of yogarove.com.
9. Camel Pose (Ustrasana)
a. Description
Camel Pose, or Ustrasana, is a deep backbend that involves reaching back and holding onto the heels while arching the spine. This pose provides a strong stretch for the entire front body, particularly the chest, shoulders, and hip flexors.
b. Benefits
Camel Pose increases flexibility in the spine, shoulders, and hips. It helps to expand the chest, improve posture, and stimulate the abdominal organs. This pose also boosts energy levels, relieves fatigue, and promotes a sense of confidence and empowerment.
c. How to Do It
Start kneeling on the mat with your knees hip-width apart and your thighs perpendicular to the ground. Place your hands on your lower back, fingers pointing downwards. As you inhale, press your shins and the tops of your feet into the mat, and gently lift your chest towards the ceiling. Exhale, and slowly start to reach back, bringing one hand at a time towards your heels. If you can comfortably reach your heels, you can go further by gently pushing your hips forward and arching your spine into a deeper backbend. Keep your neck in line with your spine and avoid straining your neck or compressing the back of your neck. Hold the pose for several breaths, gradually increasing the duration as you build strength and flexibility. To release the pose, bring one hand at a time back to your lower back, and then slowly come up to kneeling position.
d. Modifications and Variations
If reaching for your heels feels challenging, you can place your hands on your lower back or bring your fingertips to touch the tops of your feet. You can also use blocks placed at the base of your feet for additional support. These modifications allow you to experience a similar stretch and still receive the benefits of Camel Pose while gradually working towards a deeper backbend. As always, listen to your body, respect your limitations, and make adjustments as needed to ensure a safe and comfortable practice.
10. Pigeon Pose (Eka Pada Rajakapotasana)
a. Description
Pigeon Pose, or Eka Pada Rajakapotasana, is a hip-opening pose that stretches the glutes, hips, and outer thighs. It is a powerful pose for increasing flexibility in the lower body and releasing tension in the hip area.
b. Benefits
Pigeon Pose helps to increase flexibility in the hips and improve range of motion. It also stimulates the internal organs, improves digestion, and releases emotional and physical stress stored in the hips. This pose offers a deep stretch that can be both challenging and therapeutic.
c. How to Do It
Start in a tabletop position on your hands and knees. Slide your right knee forward and place it behind your right wrist. Extend your left leg straight back, keeping your toes tucked under. Your right foot can be positioned closer or further away from your left hip, depending on your flexibility. Inhale, lengthen your spine, and as you exhale, walk your hands forward, lowering your upper body towards the mat. Rest your forearms and forehead on the mat or use a block or bolster for support. Allow your hips to soften and relax, gradually sinking deeper into the pose. Hold the pose for several breaths, feeling the stretch in your right buttock and hip. Slowly come out of the pose by walking your hands back towards your hips and transitioning back to a tabletop position. Repeat on the other side.
d. Modifications and Variations
If you have tight hips or find it difficult to lower your upper body towards the mat, you can place a block or bolster under your right hip for added support. Another option is to practice Pigeon Pose on your back, with the right ankle placed on top of the left thigh, gently threading the needle. This variation provides a similar stretch for the hips while reducing pressure on the knees. As always, listen to your body’s needs and adjust the pose to suit your flexibility and comfort level.
In conclusion, incorporating these top 10 yoga workouts for flexibility into your regular practice will not only enhance your range of motion but also provide countless physical and mental benefits. Remember to approach each pose with mindfulness, focusing on your breath and respecting the limitations of your body. With consistent practice and patience, you will gradually witness improvements in your flexibility, strength, and overall well-being. So, roll out your mat and embark on a journey of self-discovery and transformation through the practice of yoga.

This image is property of i.redd.it.